
The 5GASP command line interface was developed to facilitate the creation of testing descriptors.
Creating a Virtual Environment
First, we recommend using a virtual environment. In this example, we will be using pyenv. Now, let’s create the virtual environment by running the following command:
pyenv virtualenv 3.9.14 5gasp-cli-tutorialNow that it was created, let’s activate it:
pyenv shell 5gasp-cli-tutorialInstalling the CLI
After activating the venv, we need to install the CLI package, for that, we will be using pip which is the package installer for Python.
We simply need to type:
pip install 5gasp-cliCLI
At this moment, the CLI has three features/commands:
- list test beds
- list available tests
- create testing descriptor
Listing the Test Beds
Let’s dive into the first command.
If we wish to see the available test beds, we can do it by running:
5gasp-cli list-testbeds
As we can see, the available test beds were listed. From here, we can also see the available tests for a specific test bed.
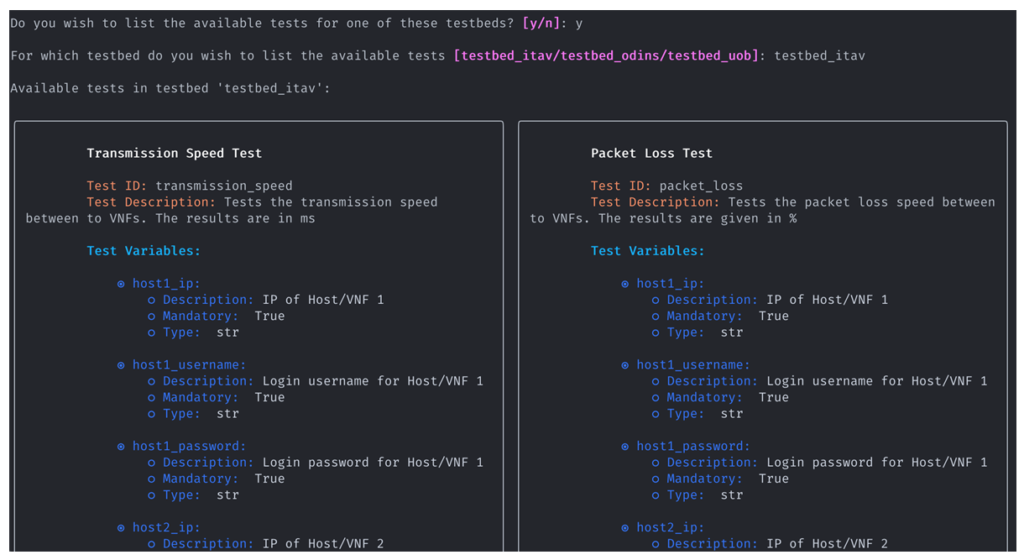
Listing the Available Tests
Another feature of the CLI is the ability to list all the available tests, as well as their parameters. We can use this feature by running:
5gasp-cli list-available-testsCreating a Testing Descriptor
Now, the final and most complex feature: creating a testing descriptor.
We can access it by running:
5gasp-cli create-testing-descriptorThis command has two options:
- output-filepath: specifies the path to the created descriptor (can be a directory or a file);
- infer-tags-from-nsd: one or more NSDs (Network Service Descriptors) can be passed to infer connection point tags from.
In this example, we will be passing both options, although they are not required.
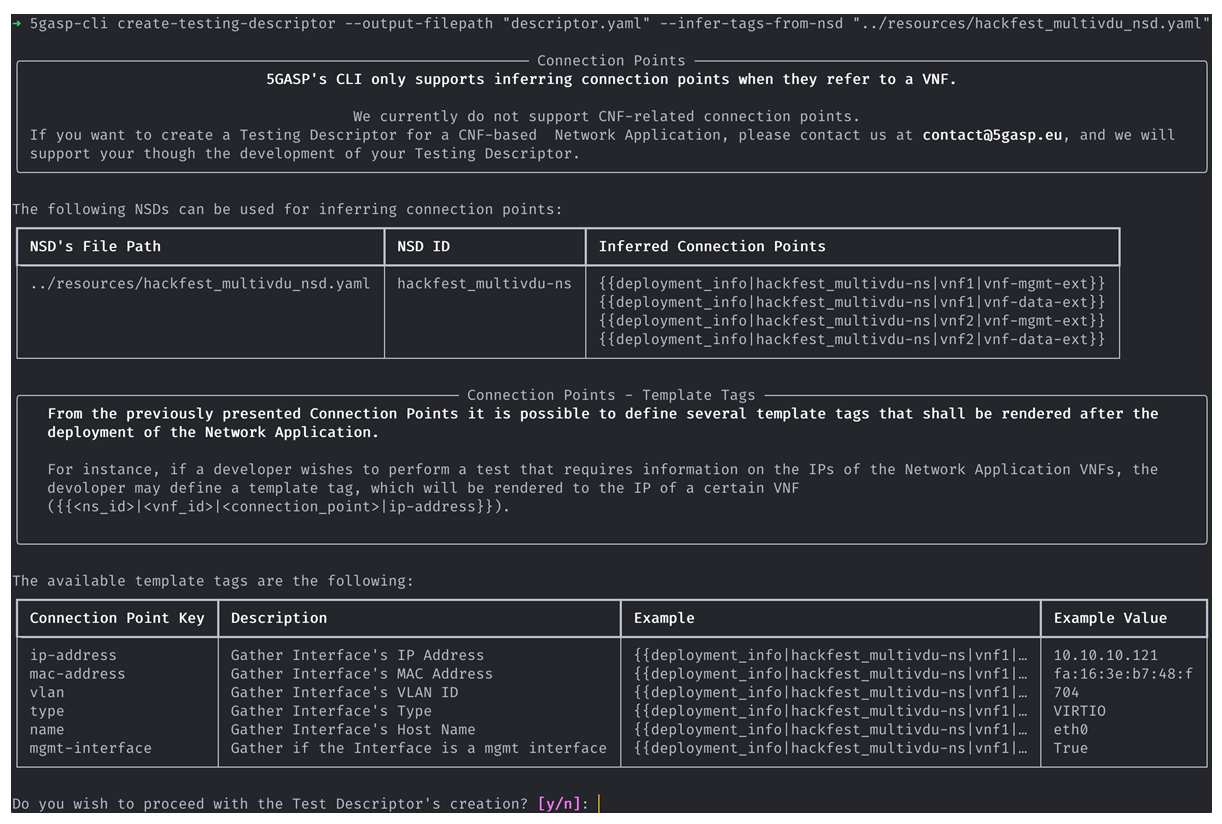
Note: Currently, the 5GASP CLI only supports inferring connection point tags when they refer to a VNF, CNF-related ones are not yet supported.
For a connection point, there are also template tags that can be defined that shall be rendered after the deployment of the Network Application.
If no NSD is passed as an option, there will be no inferred connection points, in that case, all the added test variables’ parameters will have to be manually input.
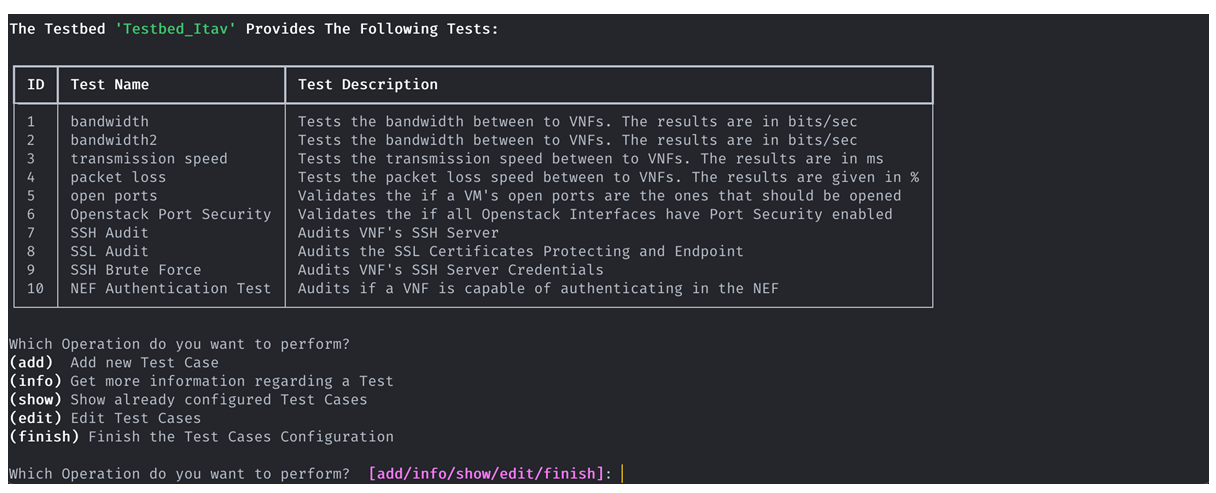
When creating a testing descriptor, firstly we need to specify the network application and the network service’s names, as well as the testbed in which we want to validate your Network Application.
Following, this menu is presented with the available options for the creation of a testing descriptor.
When adding a new test case, if the variable can be injected by the NODS. We can choose a connection point (CP) and its template to be injected.
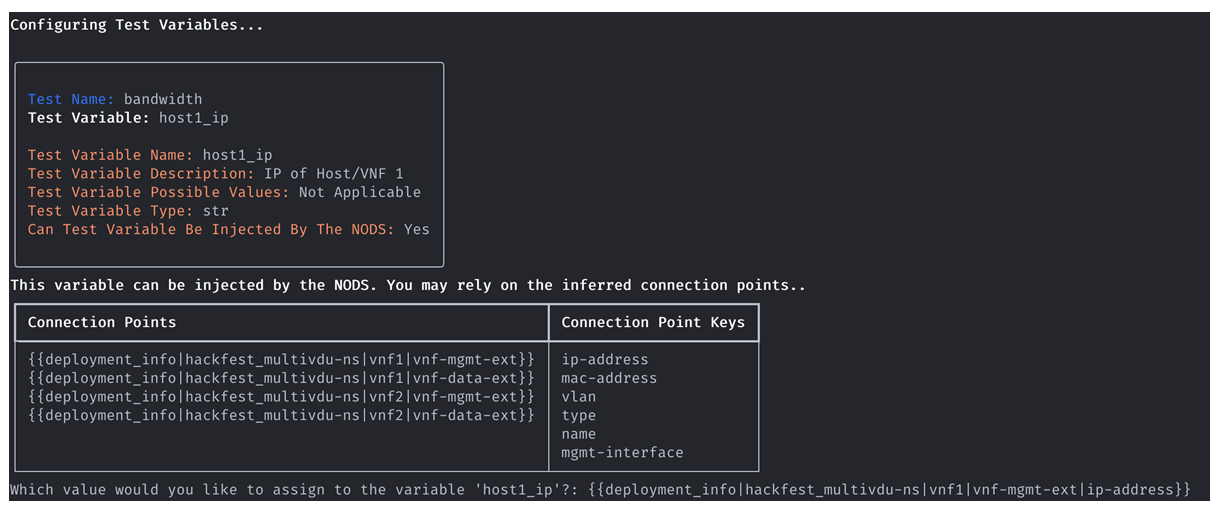
For demonstration purposes, we added two test cases, as can be seen on the picture below.
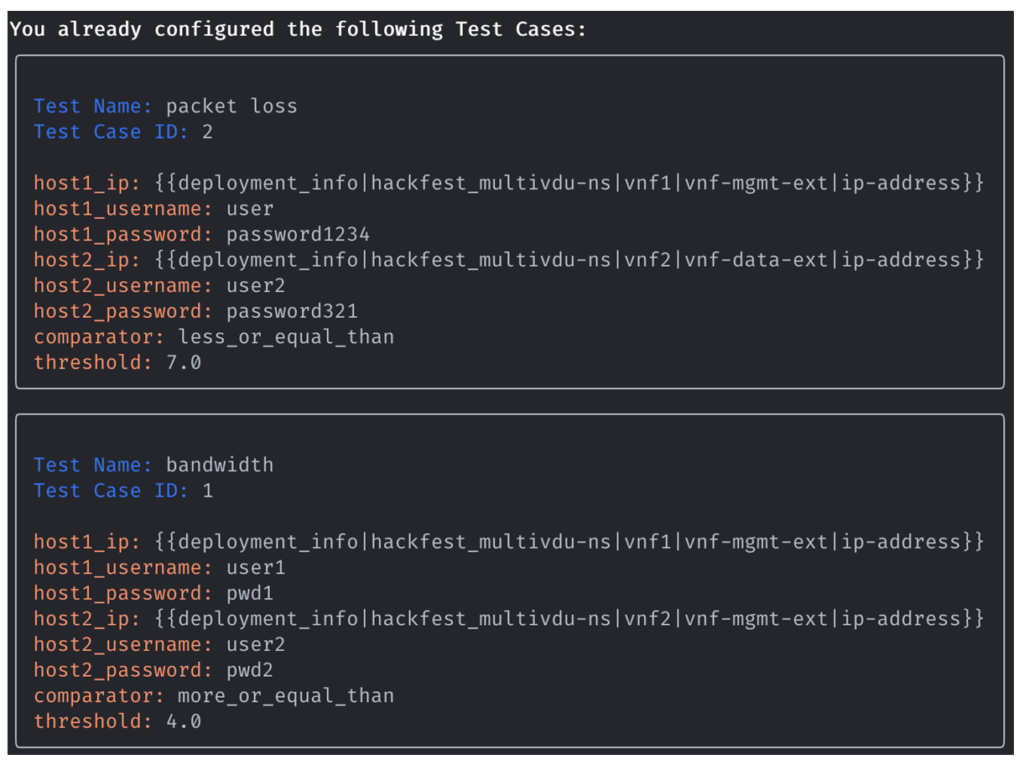
The CLI also allows us to choose if we want the defined test cases to be executed in a specific order or a random one.
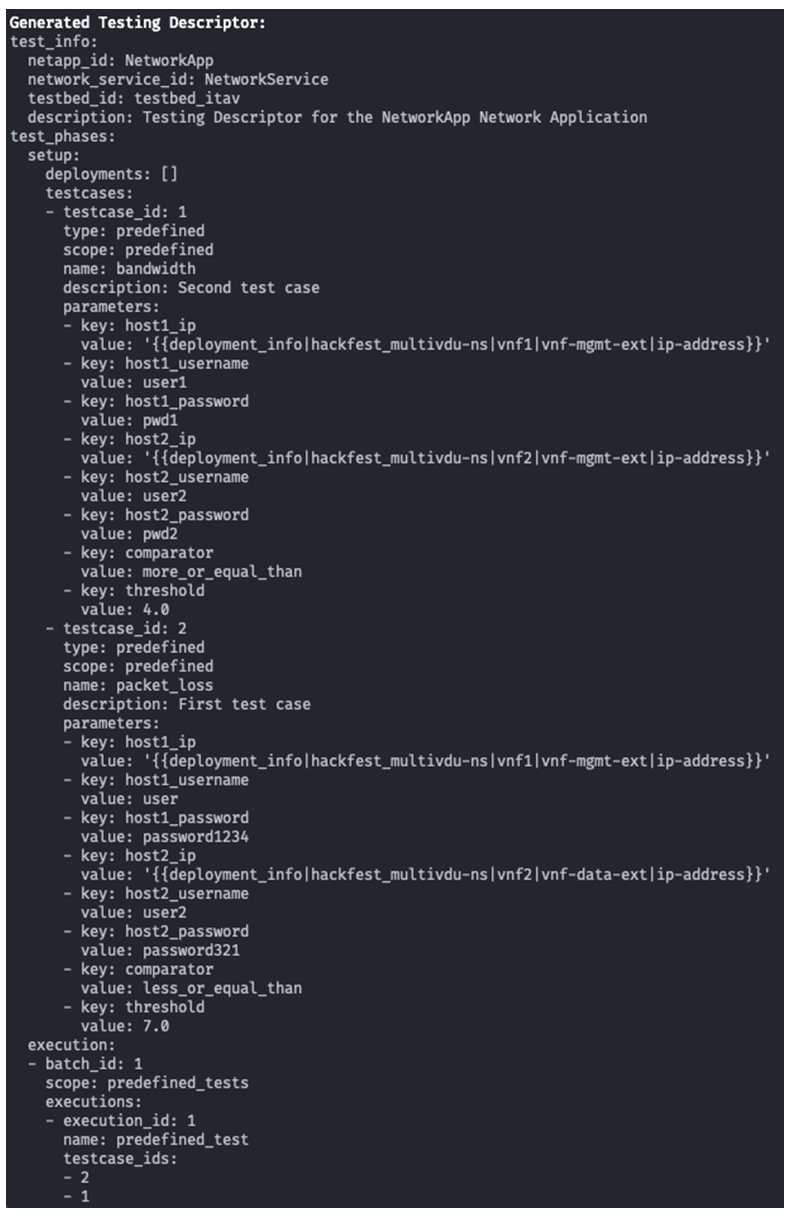
Finally, the created testing descriptor is presented and saved.
These are the current features of the 5GASP CLI, with more to come.
If you want to know more, you can check the CLI’s tutorial video: