
Robot Framework
For this tutorial, we will use the Robot Framework, which is an open source framework that is used to test automation. Obviously, there are similar tools that you can also use.
The robot tests can analyse the connection between 2 VNFs, but they can do a lot of different things. For example, it can test the connection between 2 VMs.
The tests performed for 2 VNFs can be:
- BandWidth
- Open Ports
- Packet Loss
- Transmission Speed
- Jitter
- etc
Installation
Firs of all, you need to install the robot framework in your machine:

In this case, we will be testing the Jitter. Before that, create the needed files:

After that, you can check the structure of your file using the tree command:

Code
To avoid changing the variables in the script, we will use environment variables:
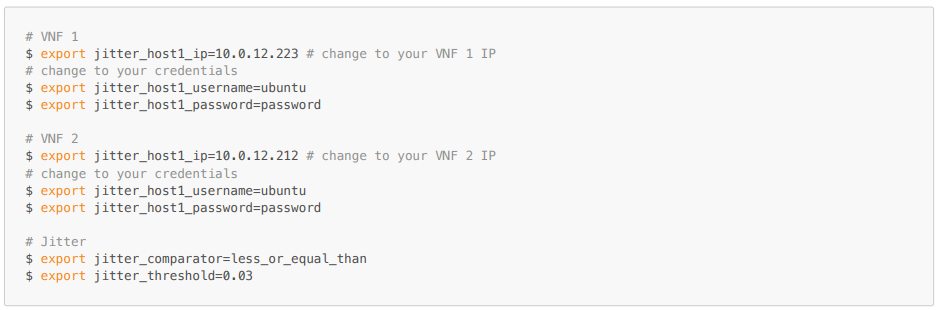
As you can see, we defined the IP and credentials for both VNFs.
The username and password also need to be defined because we will be executing commands through SSH.
Finally, the last 2 commands define the comparator and the threshold for the Jitter.
jitter/jitter.py
Now, we can start to edit the python script:
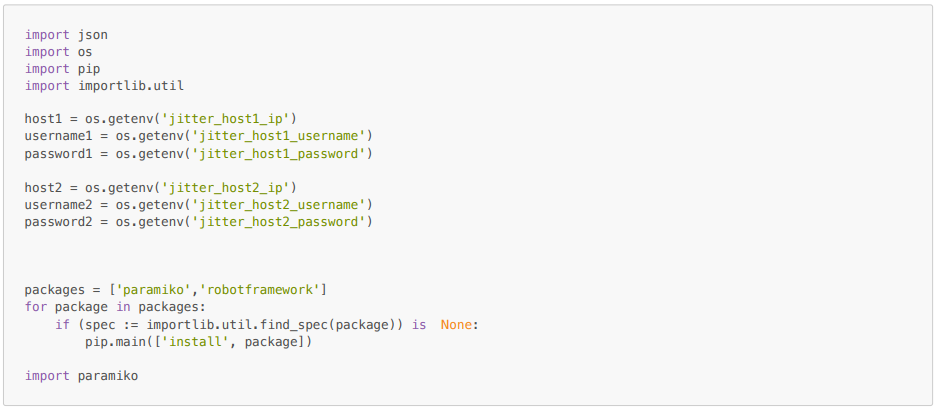
As you can see, we are using the environment variables to define the IPs and credentials of the machines.
After that, we are checking if the needed packages are installed and, if not, install them. This can also be done manually.
The paramiko package is used to run commands through SSH in each VNF.
After that initial code, we can make the test function:
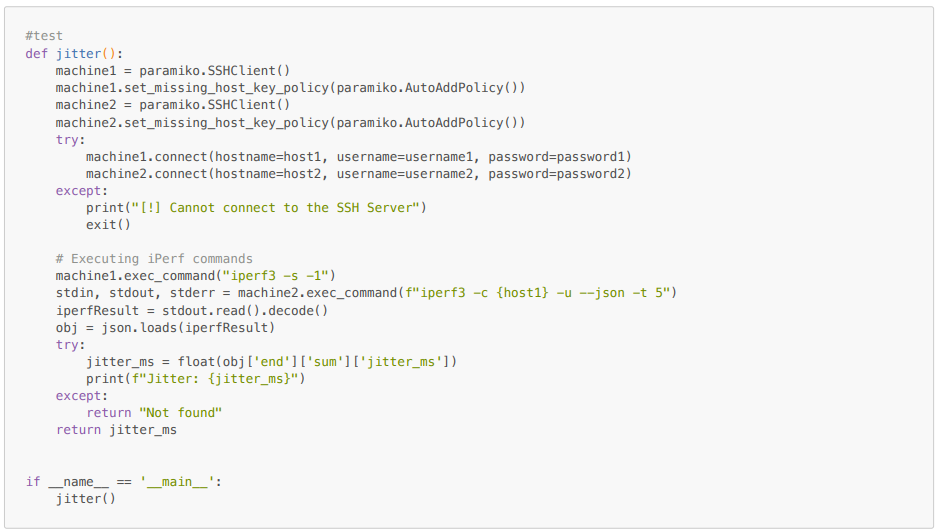
In the first part, we are connecting to each VNF using an SSH client from the paramiko package.
Having the connection to the VNFs, in the second part, we are executing the commands to obtain the Jitter, using iperf3, and then returning it.
jitter/testJitter.robot
Now, we will edit our robot file:
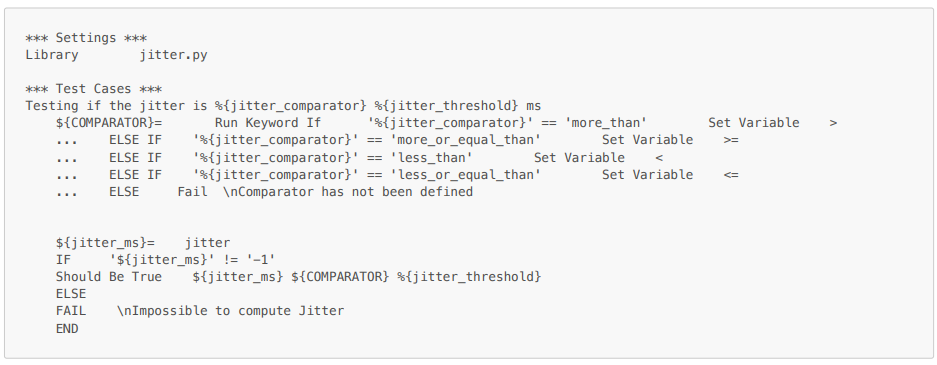
In *** Settings ***, we are defining the python script to be used (jitter.py), which we just created in the previous section.
Inside *** Test Cases *** we can define the test itself.
Firstly, we are assigning the environment variable jitter_comparator to the comparator itself. In our case, since our EV had the value less_or_equal_than, the comparator will have the value <=.
Then, using the returned jitter value from the python script, the robot test will compare it to our threshold, defined in our EV jitter_threshold (0.03).
Iperf3
Before running the test, we need to make sure that the iperf3 package is installed in the VNFs, so the jitter can be obtained.
For that, you have 2 options:
- Install through SSH command in each VNF:
sudo apt-get install iperf3 - Through the VNF cloud-init files
Run the test
Make sure you exported the environment variables.
With that in mind, we can now run our test:

If everything goes accordingly, you should obtain this output:
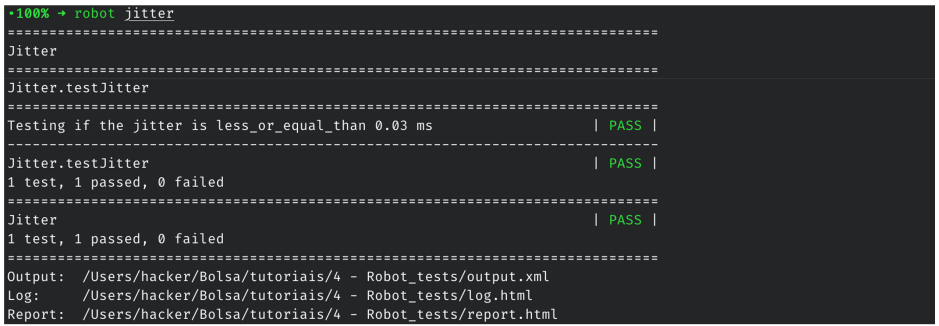
As you can see, the test was successful.
Logs
The robot framework automatically generates a log.html file that contains the test details:
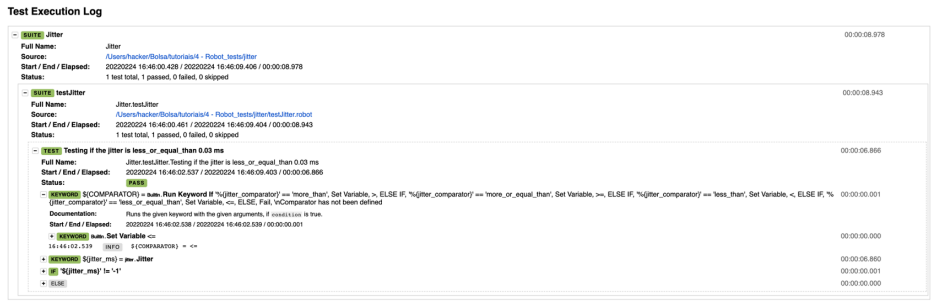
As it is visible, you get a very detailed description on what happened, like the values obtained and each step of the test.
Materials
For a better description of the tutorial, you can check our video here.
You can also check a PDF version of this tutorial here.