
Software installation
Installation of juju and charmcraft:

Creation of the Charm structure
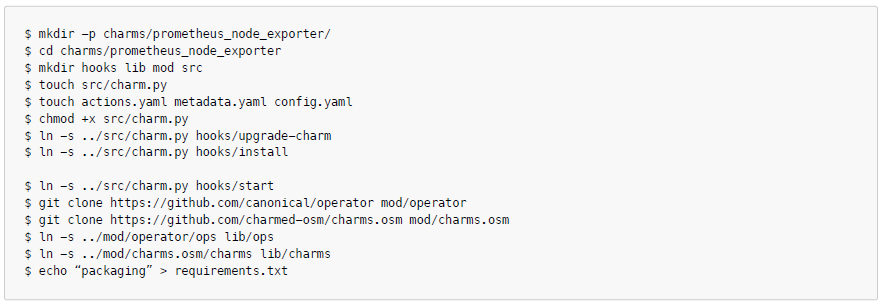
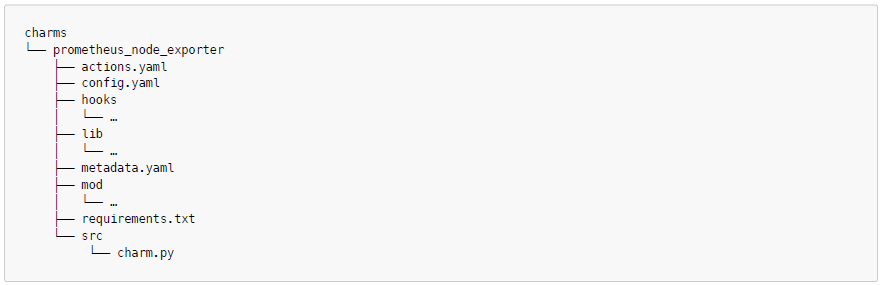
After running these commands, you should have the following structure:
Changing files
Changing files to create a basic charm
metadata.yaml
You should replace the maintainer:

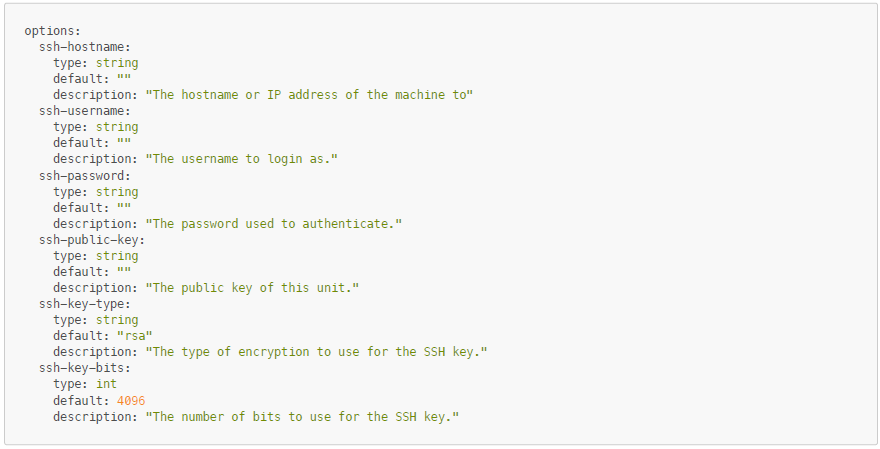
config.yaml
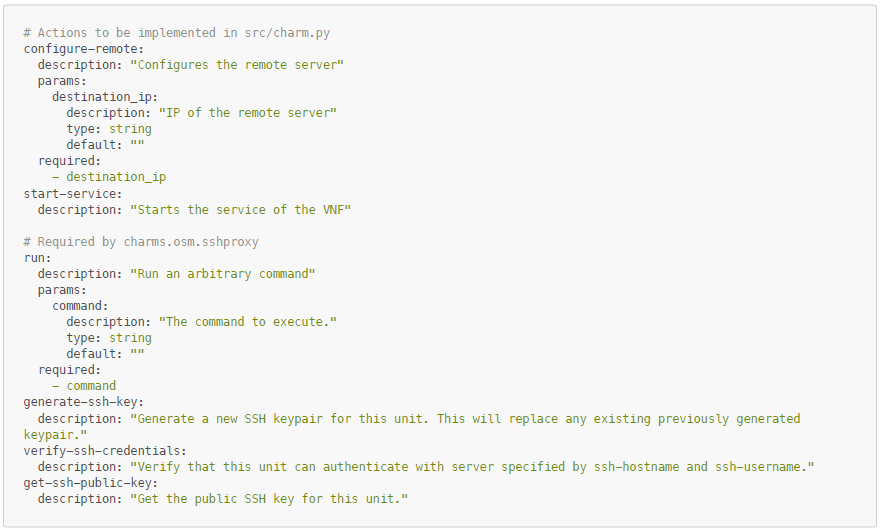
actions.yaml
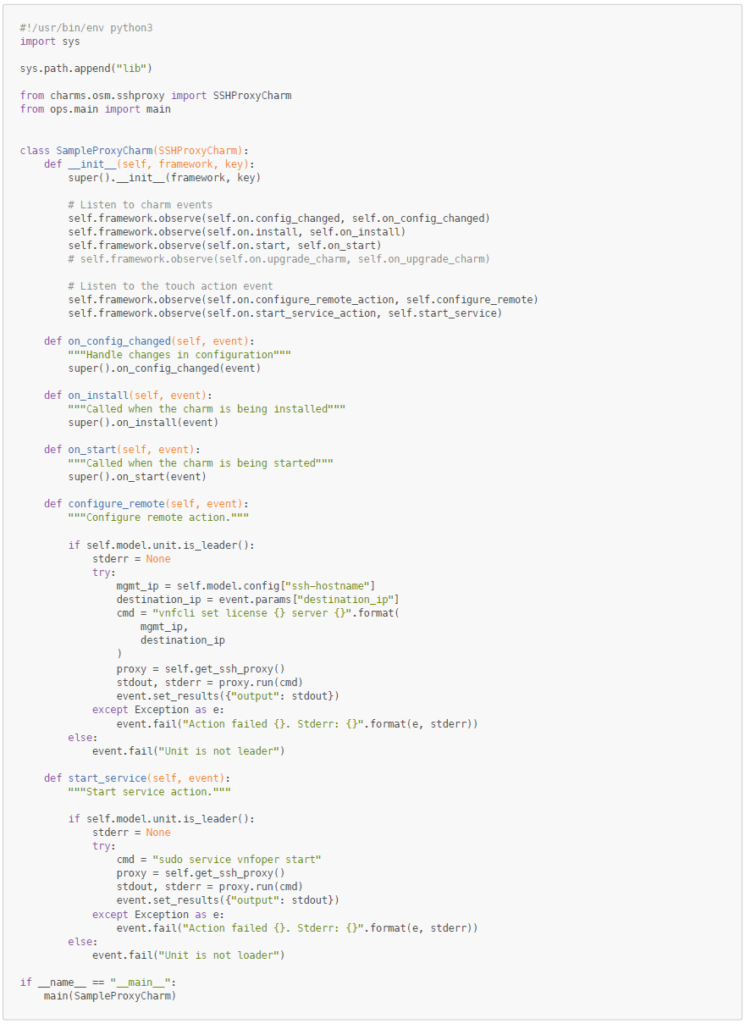
src/charm.py
local-config.yaml
Keep in mind that you should replace the hostname with your machine, as well as the username and password that you have.

Notes
Before building the charm you might need to execute the following commands:
$ lxd init --auto
$ lxc network set lxdbr0 ipv6.address none
Build the charm:
$ charmcraft buildBefore deploying you might need to choose your controller (In your case should be localhost):
$ juju bootstrapDeploying the charm using the configurations in the local-config file:
$ juju deploy ./prometheus-node-exporter_ubuntu-20.04-amd64.charm --config local-config.yamlCheck status:
$ juju statusExecute the ‘run‘ action to run a command inside the VM/VNF. You can check your unit_id with juju status.
$ juju run-action prometheus-node-exporter/<unit_id> run "command"="ls -la" --waitAdding the Prometheus Node Metrics Exporter’s logic
Update actions.yaml

Update src/charm.py
Add needed imports

Inside the SampleProxyCharm class add the custom actions
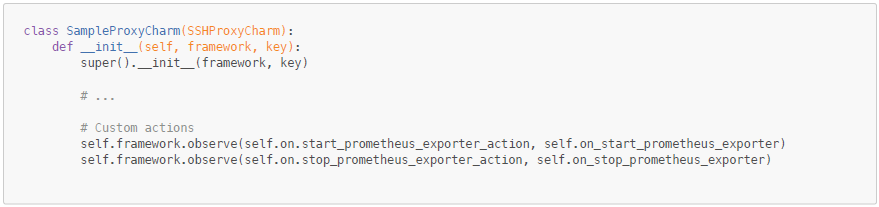
Define the 2 functions inside the class:
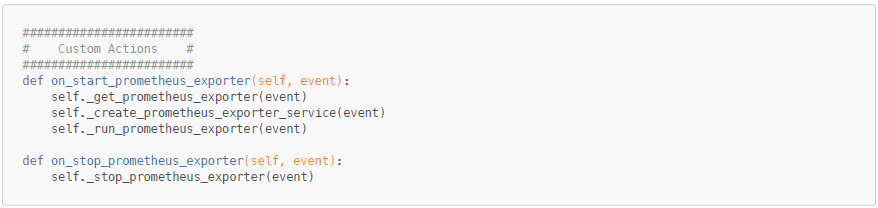
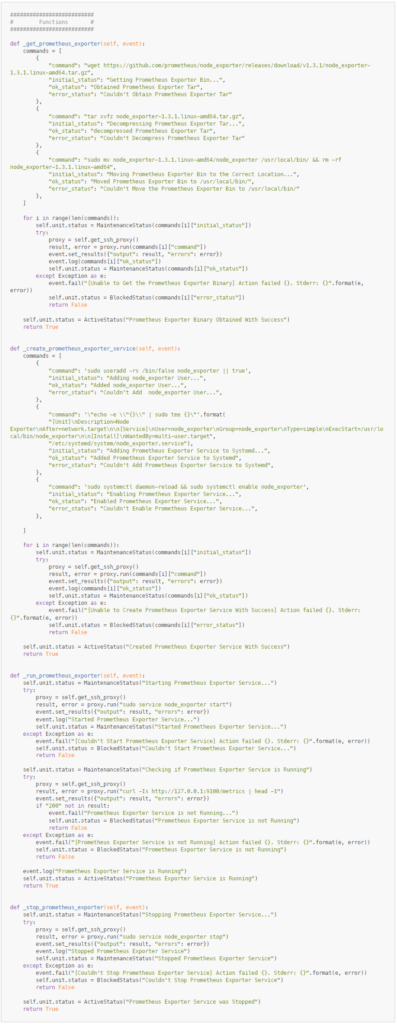
Add functions to handle the prometheus:
Check if charm is working.
Build and deploy the charm again.
First, remove the first charm that we deployed:
$ juju remove-application prometheus-node-exporterUsing the commands in the first charm, build and deploy.
Run the action for the prometheus that we created:
$ juju run-action prometheus-node-exporter/<unit_id> start-prometheus-exporter --waitUseful juju commands
Delete an application
$ juju remove-application <application_id>Delete a machine
$ juju remove-machine <machine_id>Check deployment logs
$ juju debug-logContinuously observe deployment status
$ juju status –watch 5sAccess machine terminal
$ juju ssh <machine_id>Tutorial materials
For a better description of the tutorial, you can check our video here.
You can also check a PDF version of this tutorial here.